• Blog
  • About
  • Contact

Continue?

4/29/2016

1 Comment

 
Hi all,

2015 has flown by, and now we're looking at the end of April of 2016. My creative juices are still flowing and my FB page has had a few posts here and there in the last few months, however I miss my blog.

That being said, it's a lot of work to keep posting on a bi-weekly basis. Would anyone be interested if I returned to this blog? Please vote below. :]

Thanks!
- Nat
​
Submit
1 Comment

"Vestido Branco com Manga Morcego" English Translation

2/26/2015

1 Comment

 
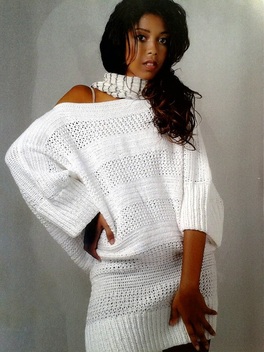
A lovely redditor on /r/crochet posted a link requesting a translation for a pattern that she found on a Brazilian blog. Before we jump straight to the pattern, I want to take a moment to credit the original website and write some much needed notes based on the pattern itself.
Picture
Credits:
- Original Pattern Blog: Ponto Arroz Blog
- Creation: Lilian Kimura for Coats Corrente
- Crocheted by: Atelie Morena Jambo
- Model: Hana Oliveira
- Size: 38-40

Notes (please read):
- The designer does not tell you what to do, she only tells you how many times you need to work the "groups" of stitches in the diagram. 
- The designer also doesn't tell us whether she is working in the round or if she's working in rows. I'm going to go with the row option since she has you join the work at the end using sc's.
- And lastly, the designer also left where you're supposed to increase in the pattern. I've bolded the rows that you need to increase, but it's up to you to decide where to place those increases.

You will need:
  • 6 skeins of Camila Fashion yarn (500m) in white.
  • 2.5mm Hook.

Instructions:
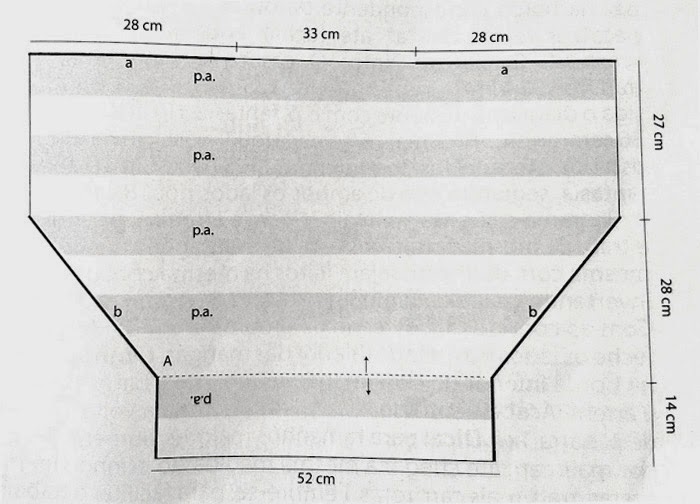
The piece is worked first by crocheting the back piece and stopping at the neckline. Before working on the sleeves and bottom detailing, the entire piece will look flat like a blanket until both sides are sc'd together. Here is a diagram explaining the sizes for the back/front pieces:
Picture
Picture
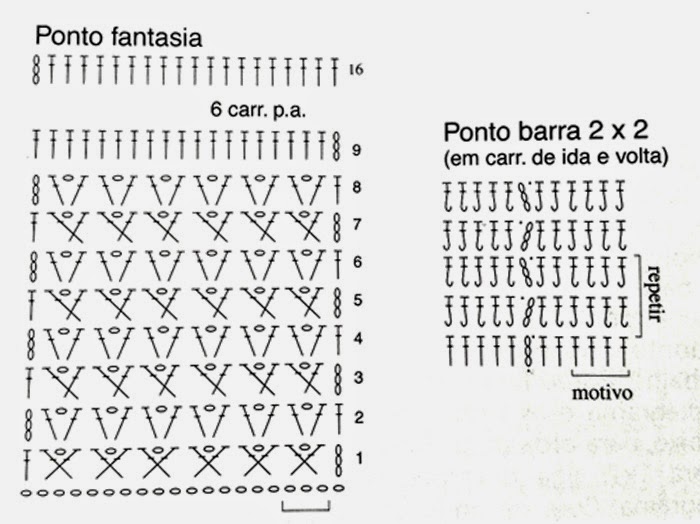
In the upcoming pattern, please refer to this image for the stitch groupings.
Back:
Row 1: Make 149 chains loosely and work in "ponto fantasia" (In the diagram, ponto fantasia is a row of dc's that end with a chain 3).
  • In the first group of every motif change, distribute the stitch and motifs equally and then accompany with the 7 groups after. THIS MEANS YOU HAVE TO FIGURE OUT THE INCREASES YOURSELF IN THE FIRST ROW OF EVERY GROUPING. I have labelled this part below!
Row 2: chain 3, 49 x-stitches, dc.
Row 3: chain 3, (dc, chain 1, dc) in the chain one space of the x-stitch. Repeat until the end of the row, dc.
Row 4 to 9: repeat row one and two.
Row 10 to 17: 146 dc.
Row 18:
chain 3, 65 x-stitches, dc. INCREASE SOMEWHERE ON THIS ROW!
Row 19: chain 3, (dc, chain 1, dc) in the chain one space of the x-stitch. Repeat until the end of the row, dc.
Row 20 - 25: repeat row 17 and 18.
Row 26 - 33: 197 dc.
Row 34: chain 3, 71 x-stitches, dc. INCREASE SOMEWHERE ON THIS ROW!
Row 35: chain 3, (dc, chain 1, dc) in the chain one space of the x-stitch. Repeat until the end of the row, dc.
Row 36 - 41: repeat row 33 and 34.
Row 42 - 49: 215 dc.
Row 50: chain 3, 71 x-stitches, dc.
Row 51: chain 3, (dc, chain 1, dc) in the chain one space of the x-stitch. Repeat until the end of the row, dc.
Row 52 - 57: repeat row 33 and 34.
Row 58 - 65: 215 dc.

Front:
Work the same way as the back until you reach the neckline.

Assembling and finishing:
Close the shoulders (figure a) and the diagonal increases (figure b) with sc worked on the wrong sides, grabbing a stitch from each piece. So to clarify, work on the reverse sides of the pieces so the stitches will be invisible on the right side of the work. Leave a gap for the neckline, sleeves and bottom torso area.

Following the assembling, work the "barra" on the bottom of the piece (the thinest part). Distribute 284 dc around the entire piece (this is the barra). From here, you will work the "ponto barra", which according to the diagram, it goes as such:

PONTO BARRA:

Row 1: Dc until you reach the end of the round (I suggest you use a stitch marker for this), turn your work.
Row 2: Chain 3, bpdc, bpdc, fpdc, fpdc, bpdc, bpdc... repeat until the end.
Row 3: Chain 3, if the stitch you're starting with is bpdc, work in fpdc and do the opposite of the stitch below until the end. So if the bottom stitch is fpdc, work a bpdc. If it's bpdc, work a fpdc.
Work 23 rows of ponto barra.

Sleeves:
Distribute 112 dc equally around the entire sleeve. Work ponto barra again.
Work 26 rows of ponto barra.

To finish off the sleeves and the bottom, work a row of dc.

Congratulations, you're done! Please keep in mind that both the blogger and the designer were extremely vague about the pattern, so I cannot guarantee a perfect translation. I personally have not tried this pattern yet, but if anyone has any questions, please feel free to ask!

Have a wonderful weekend!
- Nat
1 Comment

Oh No, Hay Fever!

2/23/2015

0 Comments

 
Hi everyone!

I'm recovering from a nasty bout of hay fever and I've been sofa bound for the best part of a week due to it. I know I'm a little late with a new post, but I'm happy to say that this week's post is going to be something a little different. :]

I'm just working on translating the finishing touches and I'll post it asap!

- Nat
0 Comments

Wrapped in Warmth

2/9/2015

0 Comments

 
Picture
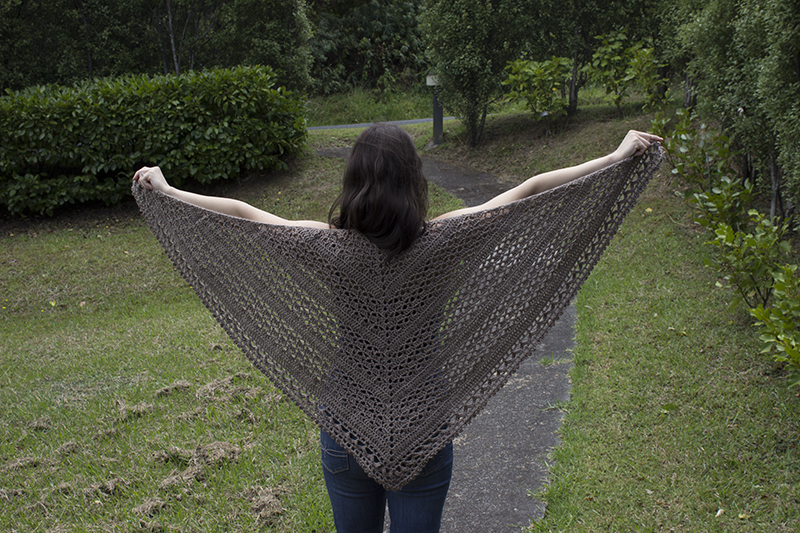
Please pardon our grass!
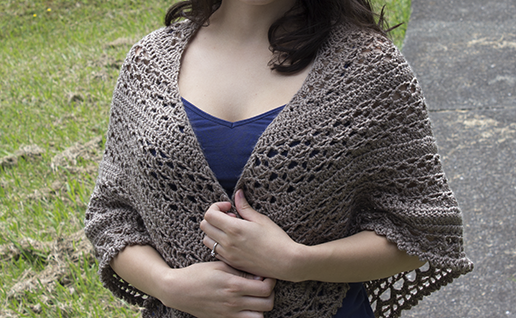
It's been a busy couple of weeks for this house wife! I finished crocheting my mom's birthday present a few days ago and I'm absolutely in love with the finished product. I was lucky enough to view the pattern on Ravelry during a Reddit promotion and received a copy for free, but I fell so hard for the shawl that I would've happily purchased it. 
Picture
At the last solid row of dc's, I counted my stitches before starting the edge and I realized that I was suddenly two stitches short. Panic ensued and I spent a solid hour trying to identify which row was missing two stitches, but after counting and recounting the rows, I just took a deep breath and decided to carry on. Missing two stitches became a problem after the first row of the edging, but thankfully I have enough crocheting experience by now to freestyle the border and make it work. I added two groups of 5 dc to the shell stitch part of the edging and you can't even tell where I fixed it. :] It worked out beautifully. 


Here's a few more details on the project:
- Wrapped in Warmth Pattern.
- 4 Seasons Yarn in Taupe, 300 grams.
- 5.5mm, I Hook.
0 Comments

Lino's Coat

1/27/2015

0 Comments

 
Picture
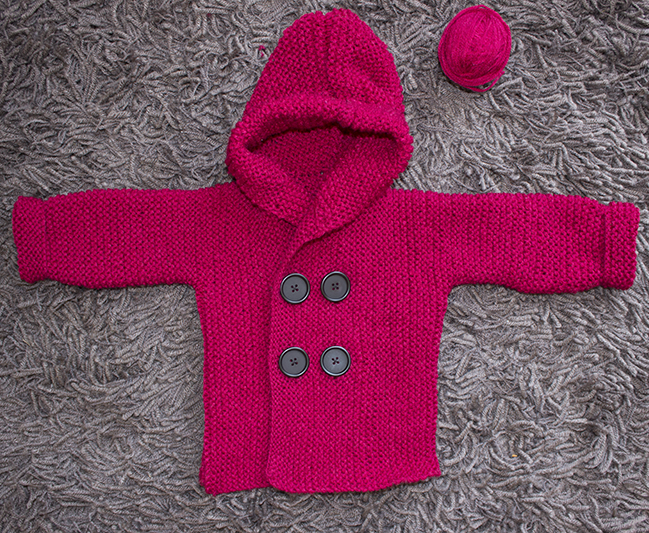
This is my absolute first needle knitted project, or as my partner called it: baptism by fire. I've always wanted to give needle knitting a try ever since I was a child, but I simply could not get the hang of it. 

Luckily, everything I learned last year helped me get to this point:
- By learning how to loom knit, I saw how each stitch was formed and learned how the stitches correspond with each another. 
- Crochet taught me how to hold onto yarn with an extended figure and to be diligent with the movements even if the tension is wonky. The motions used in crochet eventually taught me how to needle knit in the continental style, and from there, nothing was going to hold me down.

Just like with crochet, I taught myself the basic stitches and got really eager to work on something challenging... so I decided to jump straight into a peacoat. Yeah, my partner thought I was crazy too. 

"Why don't you start off with something small... like a scarf?" he said.
"NO! I'm stubborn and overly ambitious!" I replied. 
Picture
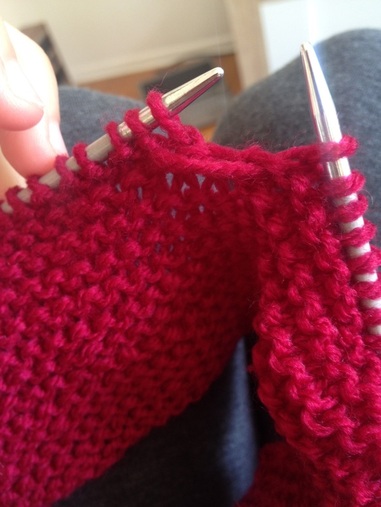
Oh no! A dropped stitch! PANIC!
I learned a LOT, such as increasing, decreasing, picking up stitches, binding off... and having to undo that bind off, Russian join, switching between straight and circular needles... the list goes on! The hood was a nightmare to do at first, and I spent hours trying to pick up the stitches properly without leaving a massive gap in some areas. Sewing on the buttons was the easiest part and I have my mother to thank for teaching me how to hand sew during my teenage years.
Picture
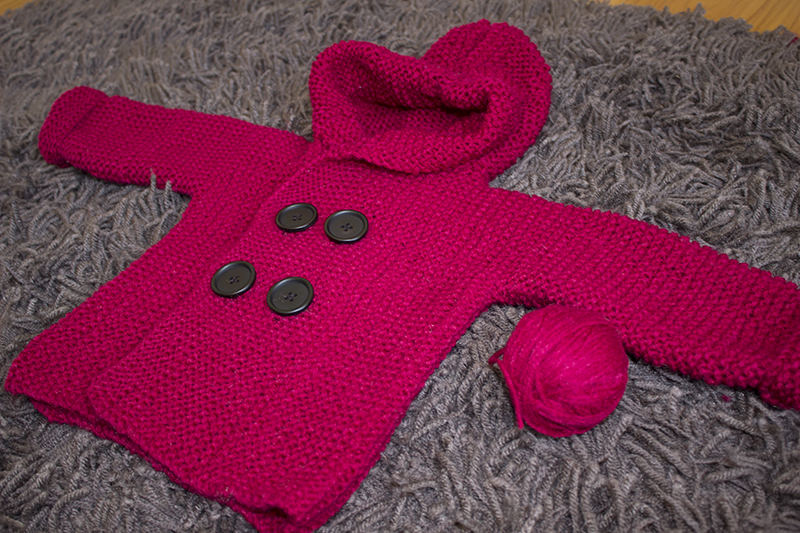
It's not perfect, but I'm really proud of my little peacoat. :] 

Needles: 4mm needles, 3.75 circular. 
Yarn: 4 Seasons Kringle, 100% acrylic, 200g. 
Pattern: http://www.ravelry.com/patterns/library/linos-coat

Hope all of you living in the Northeast are staying warm and toasty after that blizzard. If you're in the southern hemisphere like me, make sure you slap on some sunscreen even if you're staying indoors! 
- Nat
0 Comments
<<Previous
    Picture

    Nenssa

    Illustrator, Embroiderer, Crocheter, Knitter and Bibliophile.


    tumblr
    Ravelry
    Goodreads
    Follow on Bloglovin

    Archives

    February 2015
    January 2015
    December 2014
    September 2014
    August 2014
    July 2014
    June 2014
    May 2014
    April 2014
    March 2014
    February 2014
    January 2014

    RSS Feed


Powered by Create your own unique website with customizable templates.